Version 2.3.0
Copyright © 2008 The Apache Software Foundation
Incubation Notice and Disclaimer. Apache UIMA is an effort undergoing incubation at the Apache Software Foundation (ASF). Incubation is required of all newly accepted projects until a further review indicates that the infrastructure, communications, and decision making process have stabilized in a manner consistent with other successful ASF projects. While incubation status is not necessarily a reflection of the completeness or stability of the code, it does indicate that the project has yet to be fully endorsed by the ASF.
License and Disclaimer. The ASF licenses this documentation to you under the Apache License, Version 2.0 (the "License"); you may not use this documentation except in compliance with the License. You may obtain a copy of the License at
Unless required by applicable law or agreed to in writing, this documentation and its contents are distributed under the License on an "AS IS" BASIS, WITHOUT WARRANTIES OR CONDITIONS OF ANY KIND, either express or implied. See the License for the specific language governing permissions and limitations under the License.
Trademarks. All terms mentioned in the text that are known to be trademarks or service marks have been appropriately capitalized. Use of such terms in this book should not be regarded as affecting the validity of the the trademark or service mark.
Table of Contents
The UIMA Simple Server makes results of UIMA processing available in a simple, XML-based format. The intended use of the the Simple Server is to provide UIMA analysis as a REST service. The Simple Server is implemented as a Java Servlet, and can be deployed into any Servlet container (such as Apache Tomcat or Jetty).
You can make your UIMA analysis available as follows:
Package you analysis as a UIMA PEAR file.
Create a mapping file that tells the server what analysis results to show in which format.
Create a WAR file for deployment into the servle container with appropriate WEB.xml.
Deploy the WAR file into the server.
In the following, we will explain how to perform each of these steps.
If you're familiar with UIMA and servlets, you can start right here and get your first simple service running in a few minutes. If not, not to worry. We'll go over this in much more detail later on. To follow the quick start guide, you will need to have:
Tomcat or some other servlet container installed. Installing Tomcat is a breeze, see http://tomcat.apache.org/. For the purposes of this documentation, we have used Apache Tomcat 6.0.20, but other versions should work just as well if they're not too old.
The latest Apache UIMA release, plus the Apache UIMA sandbox add-ons. See the Apache UIMA download site.
Doing all this from Eclipse is convenient, but not required. If you work with Eclipse, it is useful to use the Web Tools Platform. Alternatively, just install the J2EE development version of Eclipse. The screenshots for this documentation were done with the J2EE development version of Eclipse 3.5.0 (Galileo).
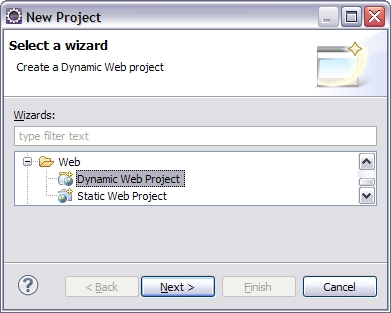
Create a Web ARchive project in your favorite development environment. We'll show you how to do this in Eclipse, but if you don't use Eclipse, you'll figure out how to do this without.
Create a new "dynamic web project" called "simple-server-test" (or whatever you like). Below is a series of screenshots that show how to create such a project.
Below is the next step in the dialog, where you can set the project name and the intended runtime. If you haven't done so yet, point Eclipse to your Tomcat installation.
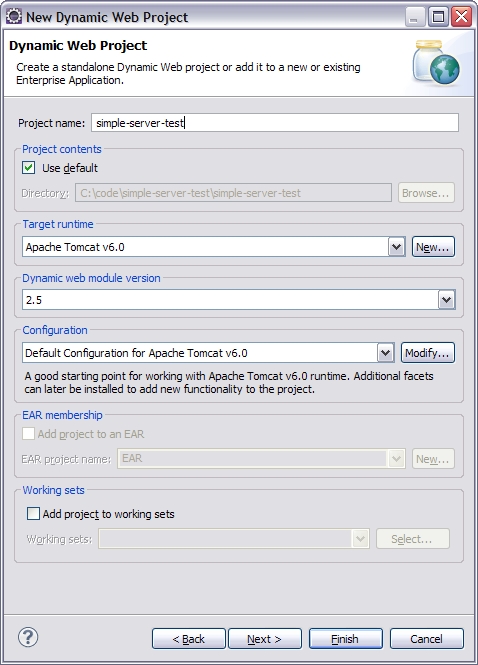
Hit finish next, accepting default settings for the rest of the project setup.
We'll now describe what jar files you need to package in your WAR file for the application to run. Note that these are jars that you will need for each and every UIMA service you deploy. So if you deploy several different services into the same servlet container, you can also copy those jars to the shared lib directory of your servlet container: you then don't have to deploy them with each UIMA service. However, for the purposes of this example, we will deploy the common jars with the WAR file.
Below is list of the required files from the SimpleServer project.
SimpleServer/lib/uima-simple-server.jarSimpleServer/lib/uima-simple-server-xbean.jarSimpleServer/lib/jsr173_1.0_api.jarSimpleServer/lib/xbean.jar
In addition, you also need
${UIMA_HOME}/lib/uima-core.jar
from your UIMA distribution. Make sure you have the UIMA core version that has the same version number as the sandbox distribution. An older version may not work.
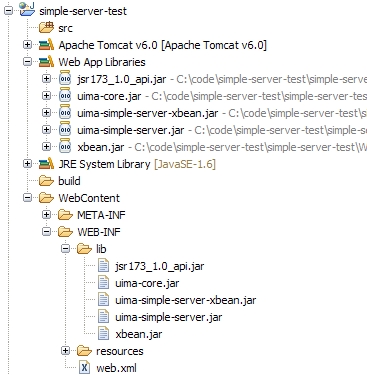
Copy all those jar files into the WebContent/WEB-INF/lib directory
of your sample project. Note how Eclipse automatically adds the jars to the Java build path under
"Web App Libraries".
We now need to add some actual analysis to run in our services. For simplicity, we'll use
the simple tokenizer that comes with the sandbox distribution. In your sample project, create
a new directory WebContent/WEB-INF/resources, and copy
WhitespaceTokenizer/WhitespaceTokenizer.pear there. Your project layout should now
look like this:
Finally, you need to update your web.xml descriptor.
Edit the WebContent/WEB-INF/web.xml file in your sample
project. Minimally, it should look like this:
<?xml version="1.0" encoding="UTF-8"?>
<web-app xmlns:xsi="http://www.w3.org/2001/XMLSchema-instance"
    xmlns="http://java.sun.com/xml/ns/javaee"
    xmlns:web="http://java.sun.com/xml/ns/javaee/web-app_2_5.xsd"
    xsi:schemaLocation="http://java.sun.com/xml/ns/javaee
      http://java.sun.com/xml/ns/javaee/web-app_2_5.xsd"
    id="WebApp_ID" version="2.5">
    <display-name>simple-server-test</display-name>
    <!-- Declare simple server test servlet -->
    <servlet>
        <servlet-name>simple-server-test</servlet-name>
        <servlet-class>
            org.apache.uima.simpleserver.servlet.SimpleServerServlet
        </servlet-class>
        <!-- Define the path to the tokenizer pear file -->
        <init-param>
            <param-name>PearPath</param-name>
            <param-value>
                WEB-INF/resources/WhitespaceTokenizer.pear
            </param-value>
        </init-param>
    </servlet>
    <!-- Declare the URL of the servlet -->
    <servlet-mapping>
        <servlet-name>simple-server-test</servlet-name>
        <url-pattern>/</url-pattern>
    </servlet-mapping>
</web-app>
If you're doing all of this in Eclipse, and you have Tomcat configured as a server, you can now right-click your project and select "Run on server...". This will start Tomcat and deploy web app.
Alternatively, you can build a WAR file out of your project. In Eclipse, right-click your project, and select "Export/Web/WAR file". Save the WAR file to some location and deploy it in Tomcat (for example, using the admin web app that comes with Tomcat).
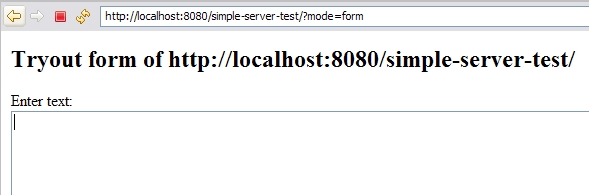
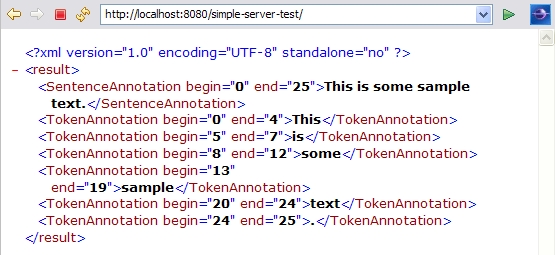
This is it, your first simple service should be ready to run. Make sure Tomcat is running and direct your browser to the following URL: http://localhost:8080/simple-server-test. You should see something like this:
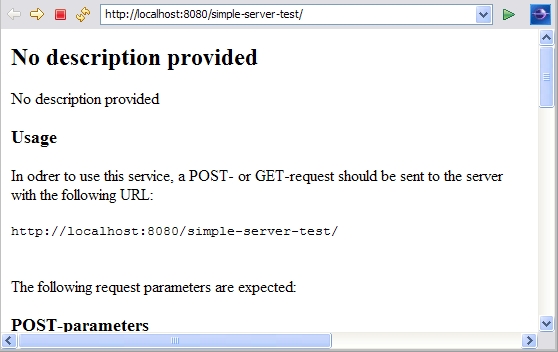
This page basically explains what kind of requests this service can handle. To actually try some analysis, the service provides a simple html form you can use to test the service: http://localhost:8080/simple-server-test?mode=form.
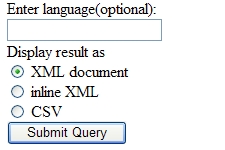
Use your browser's back button to go back to the form and experiment some more. Programmatic access to the service is described on the info page. You can also look at the unit tests in the source code for how to use Apache's HttpClient to call UIMA simple services.